Building a family dashboard with DAKboard and Raspberry Pi

Motivation
One of the projects I’ve been wanting to do for some time is create a dashboard for the hallway. This dashboard would display my family’s Google Calendar and weather data, thus helping us make sure that our children head off to school with the correct clothes and equipment for the events of the day.
Unfortunately a tight schedule has meant that this project never progressed from the idea stage, until a day or two ago, when I suddenly had a couple of hours free time on my hands....
Hardware
The equipment I used was as follows:
- Official Raspberry Pi Touch Screen in a Smarticase.
- Raspberry Pi 3.
- SD Card setup with Raspbian Jessie 4.4 (with Pixel Desktop).
- Mini USB Mains Adapter.
- My Raspberry Pi 3 has WiFi capabilities out of the box. Earlier models of the Pi (and the PiZero) will require an Ethernet cable or WiFi dongle.
- The Official Touch Screen works out of the box with newer versions of Raspian. Using other screens or older versions of Raspian may require extra configuration.
Setting up the Dashboard
I’m going to assume that your Pi and Touchscreen are set up, connected to the internet and ready to go. From this point there are only 2 simple steps to perform to setup your own dashboard.
Step 1 : Configuring DAKboard
The biggest obstacle to me starting this project was time. Basically I didn’t have the time to create my own graphical display (and set up integrations to Google Calendar etc) from scratch.
While browsing the Raspberry Pi reddit forums I came across DAKboard - which allows you to configure and access your own dashboard from any browser. You need to sign up for an account, but the service is completely free.
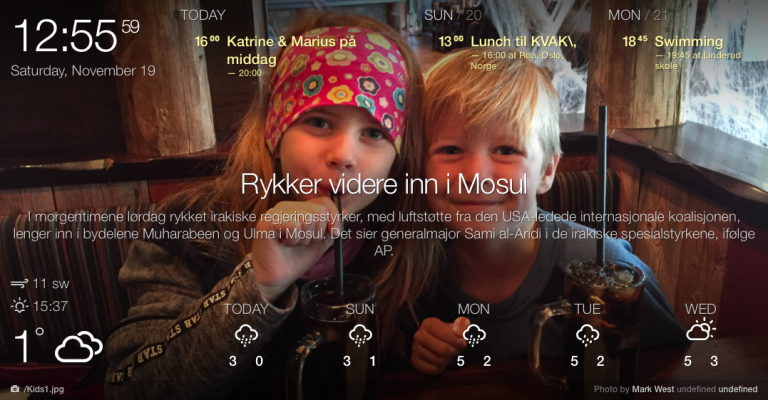
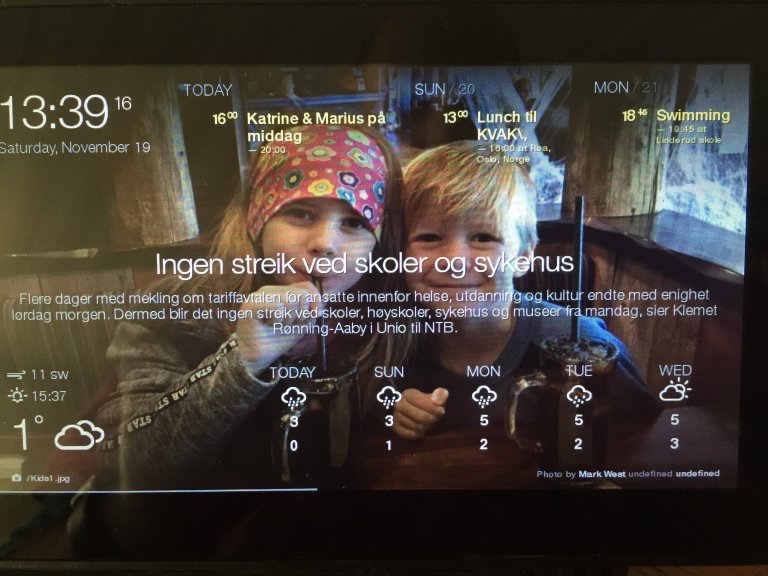
DAKboard offers the following information and integrations:
- Calendars via iCal (many calendars including Google support this standard).
- Background pictures via a range of providers such as Dropbox and Flickr.
- Weather forecast via Yahoo or WeatherUnderground
- RSS feed display.
Configuring these integrations was trivial and intuitive. Once I had signed up for an account it took me less than 10 minutes to get my own DAKboard page running on my Mac.
Now I needed to set this up to run on my dashboard hardware.
Step 2 : Configuring the Raspberry Pi
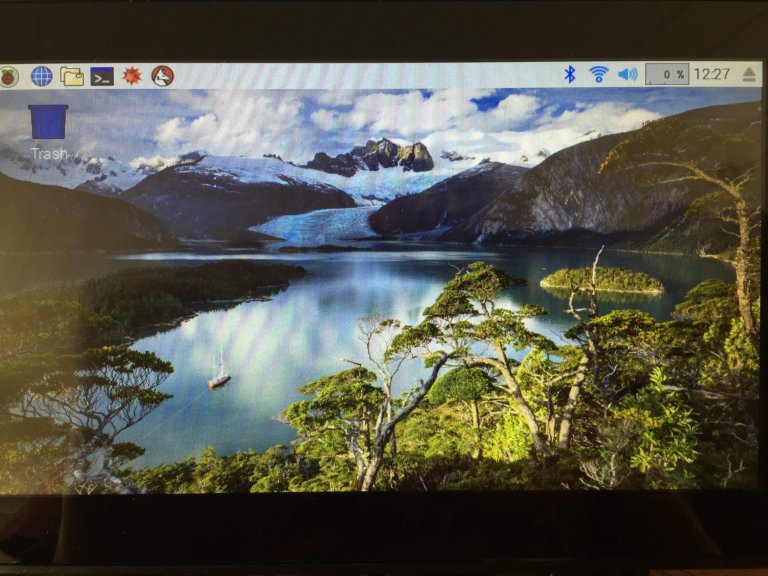
On booting up Raspian I was presented with the new Pixel Desktop environment.
One of the main changes with the Pixel Desktop is that the Epiphany Web Browser has been now replaced by Chrome. I opened my DAKboard in the Chrome browser and was presented with the following:
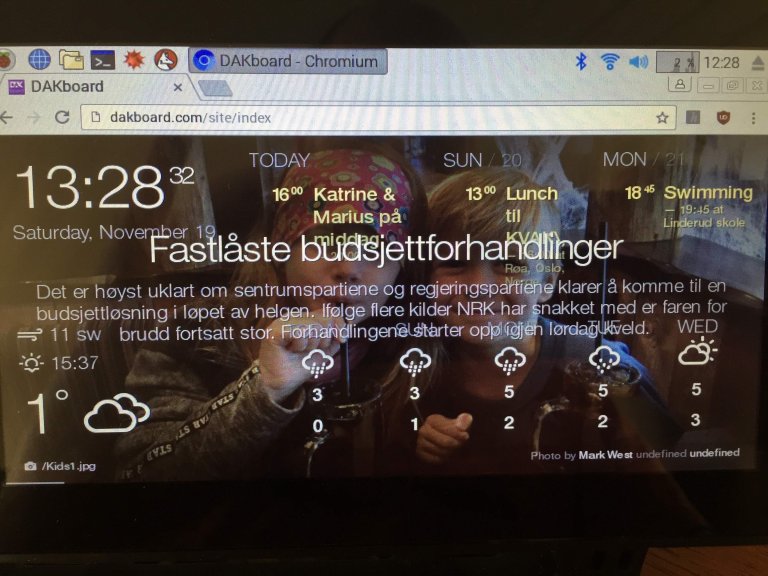
The text was too large, causing it to overlap! This was because I was moving from my 13 inch MacBook to a 7 inch Raspberry Pi screen. Luckily the guys behind DAKboard have thought of this and allowed you to adjust the font display size. I reduced the text size in my DAKboard settings and refreshed my browser.
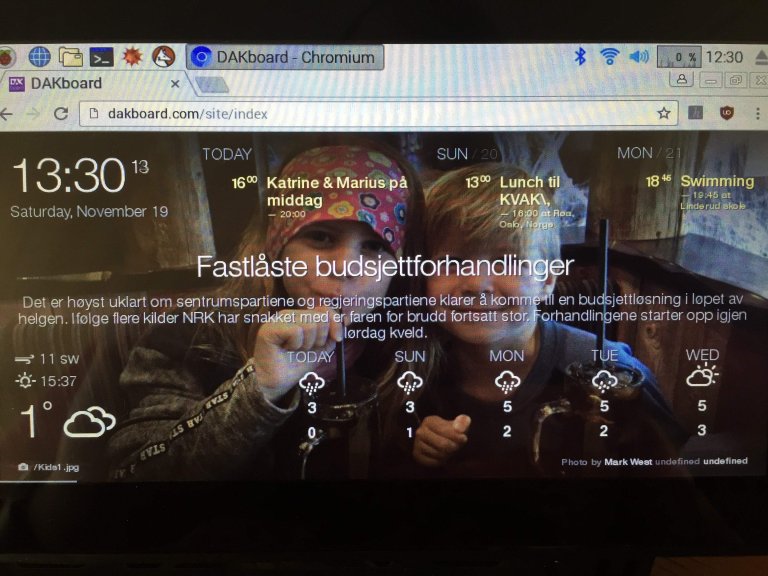
This still wasn’t optimal. A quarter of my 7 inch screens real estate was taken up by menu bars - making my dashboard look amateurish and messy. I also wanted to make sure that the DAKboard web page would be automatically opened and displayed when the Pi was rebooted or if the power was switched off and on.
I accomplished this by adding the following line to the /etc/xdg/lxsession/LXDE-pi/autostart file.
@chromium-browser --disable-session-crashed-bubble --disable-infobars --kiosk dakboard.com/?p=###
This line starts Chrome in Kiosk mode each time the Desktop environment starts up - without infobars or warnings. The final argument is a private link to my DAKboard (you’ll find your own link under the DAKboard account settings).
I also ran the following from the command prompt, which removes the mouse pointer from the touch screen display when the mouse is inactive.
sudo apt-get install unclutter
All I needed to do now was restart the Raspberry Pi and voila!
Conclusion (and further work)
I’m very pleased with the final result - especially in regards to how l quickly I got this up and running.
A big advantage with the DAKboard service is that it is so easy to set up. You can literally have a dashboard ready in minutes. In addition it is flexible - you can run it on an old PC, a Tablet or a Raspberry Pi - whatever you have lying around.
The downside of the DAKboard is it’s limited functionality. As it is closed source one is not able to go in and tweak the layout or content. For some this limitation might be a deal breaker, but I still think that DAKboard is a great time saver for your own dashboard!
The Official Raspberry Pi Touch Screen was perfect for this project. The screen goes into sleep mode after about 10 minutes and can be awakened by tapping on the screen. Perfect for our hallway as we don't need the screen to be on 24/7.
I’m now looking into to how I can add an extra web page (for example with local transport information) to the dashboard and swipe between the two. I’ll be sure to update this blog once I figure out how to do that!
Have you undertaken a similar project? Maybe you have built a Magic Mirror like the one my colleague Cato Antonsen has? Feel free to share your experiences and suggestions in the comments below.
Thanks for reading!
